Luna Creativity  : Best Blog Site For The YouTube Channel Luna Creativity

Best Site For Earn Money

Showing posts with label Web Devolpment. Show all posts

August 02, 2018

How To Add Google Analytics To Blogger


What Is Google Analytics ??
It is a free web service that tracks and reports the website traffic to us. It is 99.9 accuracy data send us about our website.  It is the widely used web analytics service on the Internet now a days. it can also be used in iOS and Android apps.

How It works ??
Google Analytics Tracking Code is placed in between the < head> tag to the every pages of  a website. It is a java-script code runs in the client browser when the client browses the page and collects visitor data and sends it to a Google Analytics Account..

How To Add Google Analytics To Blogger ??

1. Go to Blogger account and chose settings
2. Then go to Other section And scroll down to Google Analytics.

3. Now go to Analytics Account
4. Copy your Analytics Web Property ID. 
    Eg. UA-122939846-2


5. Then returned to the Blogger page and paste that      code to Analytics code box and save the settings. 

That's it now you will simply track your visitors of your website.


June 29, 2018

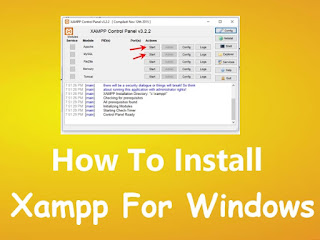
How to install XAMPP For Windows


 How to install  XAMPP For Windows

Step To Install Xampp In Windows 10/7/8.1
1.  Click To Download   Latest Version Of  Xampp From Official Site
2. Double Click To Install
3.It Will Ask You For Antivirus Programe Clik On Yes (If You Are Use Antivirus)
4. It Prompt A Warning Message Click On OK
5. Then Xampp Setup Wizard Box Appear Chose Next

7.Select Components Box - Do Not Change Anything Click On Next

8.Installation Folder - Select A Folder - C:\xampp (deafult) Do Not Change It

9.Untik The - Learn More about Bitnami For Xampp Then Click On Next

10 . Ready To Install Click On Next

10.Wait For Some Time Till The Installing Process Done

11. Chose Finish
12. Start The Server Using Start Button

13. Open Any Browser And Type Localhost Then You Will See A Sccreen Like Below Which Shows You Your Server Successfully Installed

Thats It....

Thanks ........


June 21, 2018

How to add Google custom search engine in Blogger – Google search bar


How to add Google custom search engine in Blogger

Setting up Google custom search engine in your blog is very simple and it only takes minutes to install. 


Step To Add ..

Step 1: Login to your Blogger account and head to Google CSE homepage. 

Step 2: Now at the left hand side click on “New search engine” and start entering your blog details. 

Step 3: Enter your domain name without HTTP (ex: sampleblog.blogspot.com). If you manage more than one blog then include that too.

Step 4: Choose language, name the search engine and click on create at the bottom. Now you will see a success page that says “you’ve successfully created your custom search engine”, yes you are! 

To see how it works click on public URL and start searching your site. The Google custom search engine is very basic, so before adding it in your blog we will customize it. 

Step 4: To customize the search engine go to control panel or click on edit search engine at the left hand side. Now under setup you will have five settings. Here you can give search engine keywords, search engine description, enable image search if you want etc. You can also integrate your Google adsense account, add users and there are more advanced options. After the search engine configuration move on to look and feel settings. 

 Step 5: Under look and feel you will have different themes and layouts to choose from. Customize it as per your needs and you will see the preview of this search bar towards your right side. When you finally get the desired look and feel, click on save and get code at the bottom 

Step 6: Now grab the script, login to your Blogger blog, move to Layout, click on add a gadget, choose HTML / JavaScript gadget, add the script into it and finally save it. Arrange the gadget to the desired position where you wish to render the search bar. 

 Now go and check your blog where you have added Google custom search bar. If you don’t like the look and feel then you can customize it again and drop the code in your blog. Hope this post helped you on how to add Google custom search engine in Blogger. Please share and make your comments below about this search bar. 


Thanks...

Adding YouTube subscribe button in your website (wordpress / Blogger)


YouTube is the best known way to create and promote videos online and with YouTube partner program most folks are being profitable. 

We have discussed both about how to monetize YouTube videos and the importance of online video marketing which you can have a glance. In order to get popularity in YouTube one must (channel) have a large subscribers base. The more number of subscribers will lead to more channel views and thus it eventually reaches wider audience. With more subscribers your videos and channel goes viral and they are not just subscribers, they are the fans who enjoy watching your videos.

 Making frequent updates in your channel and publishing interesting content will gain you more subscribers. In order to promote your videos and channel effectively YouTube offers various tools. We have recently discussed how to add Subscribe link to YouTube videos. Here we will see how to embed or add YouTube subscribe button in your website. If you have a website with decent traffic then you can gradually increase your social media fans and subscribers. 

Learn how to add Facebook like box in wordpress and social media widgets in Blogger. How to add YouTube subscribe button in your website Before YouTube introduced this subscribe button, people where adding the subscription link URL like this which will take visitors away from your website. hen YouTube offered a subscribe button widget which you can embed it anywhere else. With just one click and without leaving your website people can subscribe to your YouTube channel. Also this subscribe button comes with 6 themes and layouts for standard channels and 3 for paid channels. Here is how you create a YouTube subscribing button for your website. 

 Go to YouTube developer’s page and start customizing the button by entering your channel name, choosing layout and theme. You will then see a preview button towards your right side and at the bottom a button code will be generated like this. 


Just copy that and paste it in your website. ou can add this widget in to your post or sidebar by saying “Subscribe to my YouTube channel”.

For example in wordpress go to Appearance >> widgets, insert the text widget in and add the code. In Blogger go to Layout >> Gadgets, add HTML/JavaScript gadget and then place the embed code in it. Hope this post helped you with embedding 

YouTube subscribe button in your website. What is your YouTube channel name? 

How popular is your channel?

 What are the ways that you use to promote your videos and channel?

 Do you think that this widget will help boost your subscribers count? 

Please let us know by comments.

How to add custom favicon in Blogger – Change default Blogger favicon

What is favicon? Favicon is a short form of favorite icon and it is known as website icon, tab icon or URL icon with 16 X 16 pixels related to that website. hy to add Favicon? Be like a pro and blog like a pro. In order to show your blogs identity and uniqueness you need to remove that default Blogger icon and add your custom favicon. How to add custom Favicon in Blogger Adding custom favicon in Blogger is too easy. In order to change default Blogger favicon all you need is a ready made favicon of yours. You might have already created a logo for your blog. Now Go to favicon.cc and create a favicon and download the icon file. ow login to your Blogger dashboard and go to layout settings. At the top right corner you will see favicon widget, open it to change the Blogger favicon. Upload your favicon and save it. That’s it now try refreshing your blog and you will see your favicon instead of Blogger favicon. Note: For best results keep the dimensions in favicon.cc and never upload jpeg, PNG files for favicon. Hope this article helped you on how to add custom favicon in Blogger. Also check other useful tutorials for Blogger.